Once you’ve created the content for your flipped classroom, one big question remains: how to record everything?
The good news is that it’s never been easier to create and share video content. High quality video cameras are now standard on nearly every smartphone, tablet, and laptop on the market. HD webcams can be purchased for less than $100.
If your institution has already adopted lecture capture technology, there’s even better news. The software needed to flip may already be installed in your classrooms. Often, this software can be downloaded from your school’s LMS and installed directly on your laptop.
Where exactly you record your videos is sometimes a simple matter of personal taste, and is other times driven by the technical requirements of your lecture. For example, basic lectures that consist of webcam video and PowerPoint slides can be recorded wherever you’re most comfortable — in the classroom, in your office, or at home. Other times, your lecture may require the use of a classroom or lab in order to use a document camera, whiteboard, microscope or other equipment.
Wherever you decide to record your content, you’ll need two pieces of equipment: a camera and a microphone.
Selecting the Right Video Camera for your Flipped Classroom
The number of high quality, portable cameras in the market continues to grow, giving you a dizzying range of choices. Below, we’ve categorized cameras based on their capabilities and costs, and provided a few recommendations of our favorites.
Webcams
 Webcams are small, typically inexpensive cameras that are used in conjunction with a computer. Most modern laptops have built-in, forward-facing webcams, many of which are adequate for you to share a basic lecture. For a higher quality image, there are external USB-powered webcams, typically available for under $100 (as of this writing, we’re fans of the Logitech c920 and c930e). Many of these external webcams also include microphones.
Camcorders and Digital SLR Cameras
Camcorders and digital SLR cameras come in a wide range of options. Low-end consumer camcorders may actually be less expensive than USB webcams. They often have slightly lower video quality, but come with built-in zoom capability.
Prosumer and professional cameras in this category can range from a few hundred dollars to several thousand. In these models, you’ll find higher performance video sensors that provide crisp, more true-to-life images and motion. Some camcorders, and all DSLRs, support interchangeable lenses for different recording needs. Because they have internal storage, either on a hard drive or memory card, these cameras can often be an effective option for recording on the road. And through the use of USB video cards like the Magewell XI100D, these higher-end cameras can also be used to record directly to your computer.
For consumer-level camcorders, Canon’s VIXIA series provides some good options. For a step up in video quality and recording options, Sony’s CX-900 is our top pick. And for high-end DSLR-style recording, Panasonic’s mirrorless GH4 and Sony’s A7 series are great options.
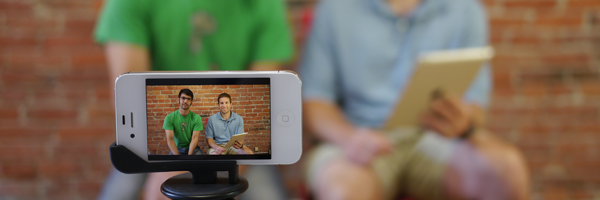
Smartphone Cameras
It is often said that the best camera is the one that you have with you. For sheer convenience and availability, nothing beats the smartphone. In fact, many of today’s smartphones include HD video cameras with astounding quality — quality, that until a few years ago, was only achievable with expensive, professional video cameras.
For example, Apple’s iPhone 6s and 6s Plus can capture full 1080p HD video in up to 60 frames per second. And when used in conjunction with apps like Videon, you can achieve near cinema-quality image stabilization on these phones.
Tip: Two smartphone accessories can make your videos appear more professional and give you additional shooting options. First, smartphone tripods are inexpensive and give your videos a more polished look. Second, snap-on smartphone lenses, like the Olloclip, Moment, and instaLens can help you capture tight shots, better bokeh, and wide-angle views than your phone’s built-in lens. For science classes and computer engineering, Bodelin’s ProScope and AidMics uHandy enable you to record with up to 100x magnification of your subject.
Action Cameras
For instructors who are often out in the field, the smartphone might be just the beginning. Designed for adventure sports, cameras like the GoPro give instructors a durable case and a high-quality image in a highly portable format. Since the GoPro can be attached to just about anything, it makes a great solution for capturing video on geological expeditions, on-site facility tours, or from the sky when attached to a quadcopter.
Document Cameras![document camera]()

Even in traditional lecture halls, document cameras have overtaken the overhead projectors they were modeled after. Document cameras provide a static overhead camera, lighting and a surface that is well-suited to display paper documents and other small objects. Document cameras are a simple, no-fuss way for you to record anything you can write, draw, or hold in your hand.
Digital Whiteboard
While it’s easy to record a traditional whiteboard or chalkboard with a camcorder or webcam (just point and shoot), a digital whiteboard offers a key difference. With these “smartboards,” the instructor’s hand and body never get in the way of the content as it’s recorded on the board. Like a document camera, the smartboard gives you a way to record drawings, equations, and notes without changing your delivery style. Electronically tracked markers allow you to write on the board as normal, while the smartboard digitally reproduces whatever is on the board in real time.
Screen Capture Tools
Although not actually a “camera,” screen capture software may be the most versatile recording tool for creating flipped classroom visual aids. With screen recording software, anything that can be shown on a computer screen can also be used to present the information to your students. Stand-alone screen recording software is widely available online, and many video platforms include built-in screen recorders.
Tip: Tip: Using two monitors is a great way to stage your content and make screen recording easier. Simply set just one screen to record, and use the other screen to prepare your content. Then when ready, bring the content over to the active recording screen. This provides a level of certainty for the presenter about what will be shown on screen.

Take advantage of multi-camera video
Sometimes a single camera angle just isn’t enough. You may need to capture a simulation from different perspectives, record each participant in a debate individually, or capture multiple break-out group activities simultaneously. Sometimes you’ll want to add materials that can supplement your PowerPoint, such as a screen recording or curated videos. Sometimes, it’s all of the above.
In the past, anything beyond a single stream of video would have presented an incredibly complicated challenge. Splicing multiple videos together required professional editing equipment, expertise, and often a considerable check written to an AV specialist.
Today though, software is making it easier than ever to incorporate all of your media content into a single recording. Modern video platforms being used for lecture capture and video management in many schools today already allow for additional video streams and screen recordings. Some of these platforms enable you to record or upload a virtually unlimited number of additional video feeds and automatically synchronize them. The result: With multi-camera video, you can tell almost any story in your flipped class recordings, no matter how complex or creative it may be, all without requiring the help of expensive AV specialists.
Selecting the Right Microphone
If good video quality is important, then good audio quality is essential. Even if you have broadcast-quality HD video, your efforts will be for naught if your audio sounds like you’re in a wind tunnel. Delivering flipped class videos with high-quality audio begins with finding the right microphone.
Laptop Microphones
All laptops come with built-in microphones, and like all technology, onboard mics continue to get better year after year. So for a basic flipped classroom recording, it may suffice. Just keep in mind that most laptop mics can’t distinguish between good noise (i.e., your voice) and bad noise, such as background noise or the tapping sound your keyboard makes. As a result, they aren’t the best solution if you can’t record from a quiet location.
Webcam Microphones
USB webcams include built-in mics. Depending on your webcam model, these mics can deliver substantially better sound than your onboard laptop mic. For example, the Logitech c930e not only delivers crisp, high-definition video, but also includes basic noise cancelling capabilities that filter out background noise. If you’ve already invested in a USB webcam and have the choice between the laptop onboard mic and the webcam mic, in almost all cases, the webcam mic will provide better audio quality.
Dedicated USB Microphones![Samson-Meteor-USB-Mic]()

A step up from the webcam mic is the dedicated USB microphone. Unlike a webcam, which provides both video and audio input, these microphones only capture audio. They’re larger than a webcam mic, but most are still quite portable. And starting around $50, these mics can deliver clearer, more realistic-sounding audio. At this price point, Samson’s Meteor mic is a great, highly-portable choice. At the high end of the USB mic spectrum, the Blue Yeti is your best bet at around $120.
Smartphone Microphones
Like laptops, all smartphones have built-in microphones, and like laptop onboard mics, smartphone mics are your baseline option for capturing audio. The beauty of the mic is that it’s always there. The challenge with the mic is that it doesn’t provide noise canceling capabilities, so in loud environments you’ll pick up a lot of ambient noise around you.
To address this issue, an ecosystem of external smartphone mics has emerged in the last three to four years. These include:
- Compact mics like the iRig Mic Cast that plug directly into your smartphone’s headphone jack
- Wired lavaliers like the RODE SmartLav+
- Condenser mics like the Fostex AR101
- Wireless bluetooth lavaliers like the Sony ECM-AW4
Of these, the wireless bluetooth lav often provides the best combination of quality and cost with the added flexibility to record audio at up to 100 feet away from your phone.

Looking and sounding your best
Once you’ve purchased your camera and mic, you’re almost ready to record. With a few simple steps, you can get the most from your new AV gear and avoid common problems with video or audio quality.
Lighting
Your approach to lighting can have a big impact on the connection you make with your students. Great lighting can make your video feel more lifelike and engaging. Poor lighting can actually impact viewer perception of your content.
Here are five simple tips to improve your lighting:
- In general, the more light you can point toward yourself, the better. The most common problem with video lighting is simply that there isn’t enough.
- Try to position yourself in direct light that illuminates your face evenly in order to avoid harsh shadows. This could be natural light coming through a window behind the camera or artificial light coming from a couple of bright, strategically positioned desk lamps.
- Avoid bright lights directly behind you, as this can create a silhouette effect. Recording a video while standing in front of a window is a common cause of this issue, and should be avoided.
- Home and office desk lamps make convenient and movable light sources. When using these as your light source, you should ideally use two, placing each at a 45-degree angle as shown in the diagram below. This helps create balanced, soft light on your face.
- For less than $20, you can purchase a couple of bright, clip-on lights at home improvement or office supply stores. These lights affix to your monitor or desk and provide ample light for flipped classroom recordings.

Audio quality
In an ideal world, every recording would be captured in a perfectly quiet, professional sound booth. Admittedly, this is a lofty albeit unrealistic aspiration. For most of the videos you record, your goal should simply be to capture audio that won’t distract students from the content you are presenting.
Here are three tips to help you get there:
- Record in a consistently quiet environment. Two qualities define “consistently quiet.” First, the location should have minimal ambient noise like traffic or background conversation. Second, it should be in a place where you don’t expect sudden noises, like doors slamming, dogs barking, or babies crying.
- Keep your microphone close enough to your mouth so that you feel comfortable speaking at a reasonable volume without raising your voice.
- Check your sound levels. There are two ways to do this. If your recording software supports audio monitoring (image below), you can see your audio levels on a meter to determine if you’re too loud or too quiet. If your software doesn’t support audio monitoring, then make a quick test recording and play it back to check your levels.
Eye contact
Finally, your engagement with the camera can affect students’ perception of your recordings. In general, instructors tend to stare at the content they’re presenting. This, however, is a missed opportunity. Instead, by consciously making eye contact with your camera, you can drive better engagement because your students will feel that you’re addressing them directly.
Of course, it may take some time for that video eye contact to feel natural. Compared to an in-class lecture, in which you can move around the room or simply turn your head to address different students, a recorded lecture doesn’t provide this flexibility. It can feel a little awkward at first to stare down a barrel of the camera for 5 to 15 minutes at a time.
Here are a few tips for making better eye-to-camera contact:
- Use your slide transitions as an opportunity to engage the camera. When you change slides, quickly skim the first bullet or two, then look up at the camera and speak directly to your audience. At first, it doesn’t need to be more than 3-5 seconds. Over time, you’ll get more comfortable extending the length of your camera gaze.
- If your video recording software includes a preview image of yourself, turn it off. Seeing yourself on-screen is a distraction. It gives you one more thing to look at and makes it all the more tempting to avoid engagement with the camera.
- Position your camera at eye level. Too often, the webcams we use force us to look up or down at them, and this leads to two problems. First, it provides an unnatural viewing angle for your students that they wouldn’t see if they were interacting with you face-to-face. Second, when the camera is below you, angled up toward your face, it generally doesn’t provide the most flattering view for your audience.
- Move away from your screen when you present. The closer you are to your screen, the more dramatic the change when shifting your focus from the camera to your content. When you sit or stand back a bit further, you can glance down at your content and back up at the camera in a less noticeable way.
- Imagine that the camera is your class. One of the benefits of face-to-face presentations is the visual feedback you get from your students. Their eyes, smiles, facial expressions, and body language give you a sense of what’s resonating and what needs to be repeated. You don’t have this luxury, of course, when staring into the inanimate eye of the camera. So try this mental exercise. With practice, it can significantly decrease the sense of awkwardness when staring into the camera.
Bonus Tip: If you typically wear glasses, be aware that glare from your computer screen may become a distracting element. Turning down the monitor’s brightness or sitting farther away can help alleviate the intensity of any glare.
Using a Teleprompter
For some subjects, you may want to script your videos. Creating a script helps you keep your content within a given timeframe, and it enables you to present more formally when it’s appropriate. Unfortunately, reading from a script traditionally required that you invest in an expensive teleprompting system, or read from a piece of paper that forced you to disengage from your audience.
Fortunately, a growing market of webcam and iPad teleprompters hopes to address these challenges. Webcam teleprompters typically sit on your laptop screen or computer monitor, placed directly over your webcam. iPad models allow you to mount your tablet directly above or below your camera. In both cases, these teleprompters help you maintain eye contact with your students without spending a fortune.
It’s never been easier to create and share high quality video content. Whether you decide to record with your own personal equipment or your institution’s existing lecture capture technology. Keep in mind:
- Cameras help give your students the ability to actually see you teach. Depending on your subject, one or multiple cameras may help you best present your materials.
- Your microphone may just be the most important tool in your flipped classroom — good audio quality is essential for students to learn from your recordings.
- While recording, remember to use ample lighting and plan to make eye contact regularly with your camera.
![ICON - CTA - Practical Guide to Flipping Your Classroom eBook]() Find out more about flipping your classroom!
Find out more about flipping your classroom!
Shifting the lecture ahead of class time opens a host of opportunities to expand the scope and diversity of materials available for teaching.
Interested in joining teachers from around the country at the forefront of the flipped classroom pedagogy? We’ve prepared a comprehensive guide to preparing, delivering, and evaluating your flipped classroom, from ideas for interactive classroom activities to the tech needed to produce recorded lessons. Download your free copy today.
The post Every Tech Tip We Can Think Of For Recording Flipped Classroom Lecture Videos appeared first on Panopto Video Platform.