Approximately 35 million PowerPoint presentations are given every day.
From classrooms to boardrooms, PowerPoint slides are the go-to medium for sharing supporting content that helps audiences absorb and connect with the concepts and ideas shared in a presentation.
What happens to all of those PowerPoint slides after they are presented, though? A handful will get shared or archived, either privately on Sharepoint or publicly on SlideShare depending on the content and intended audience.
In most cases, however, PowerPoint slides on their own — without the corresponding presentation — are incomplete and don’t do the best job of communicating the concepts from the actual presentation. In a better world, presenters would be sharing and archiving recordings of their presentations that include not only the slides but also the actual presentation itself to ensure that future viewers really saw everything.
So — what’s the best way to record a PowerPoint presentation?
If you’ve ever experimented with recording a presentation, you’ve likely tried one of the following:
- Recorded narration over your PowerPoint presentation in PowerPoint itself
- Used screen recording software to capture your slides and a voice over
- Used Google Hangouts or another video chat tool to record your slides as you present them
While each of these presentation recording methods will undoubtedly produce a resource that is a step above lifeless PowerPoint slides, they all share one glaring shortfall.
Experienced business professionals and educators will be the first to tell you that the most effective video presentations show not only your PowerPoint slides, but also you presenting. From eye contact to body language, showing the actual presentation makes the viewer feel like they are in the room — it will grab your viewer’s attention and improve comprehension and retention of your key points.
When it comes to recording employee training or other educational lectures, this method for recording a PowerPoint presentation is ultimately the best.
How To Record A PowerPoint Presentation With Panopto
Panopto’s presentation recording software makes it easy to record both yourself and your PowerPoint slides side-by-side with just your laptop and its built-in webcam and microphone. You can even live stream your presentation with one extra click.
Step 1: Prepare Your PowerPoint Slides And Talking Points
As you prep your slides and structure your presentation, think strategically about how your PowerPoint slides will visually engage your audience and support your talking points, without duplicating you plan to say. And we’ll let you in on the single greatest secret to delivering a perfect presentation: record yourself practicing.
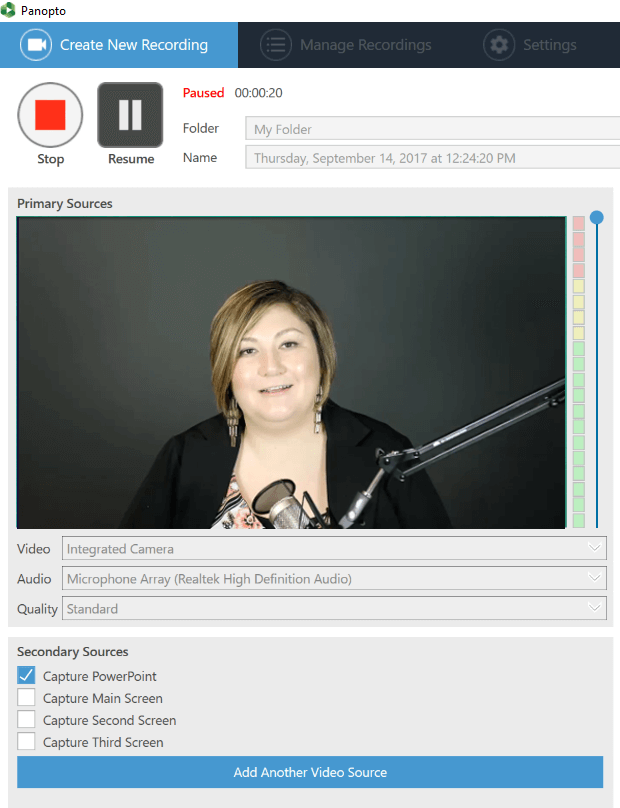
Step 2: Select Your Audio And Video Sources
Panopto will automatically detect any connected audio and video feeds, whether you’re using your computer’s built-in devices or an external webcam or microphone that you’ve plugged into your USB ports. Simply select the audio and video sources you want to use to record from the drop downs. Be sure to test the audio and video quality before you record.
You can find more tips for making your webcam recordings look good here.

Select your audio and video devices from the drop-down menus in Panopto.
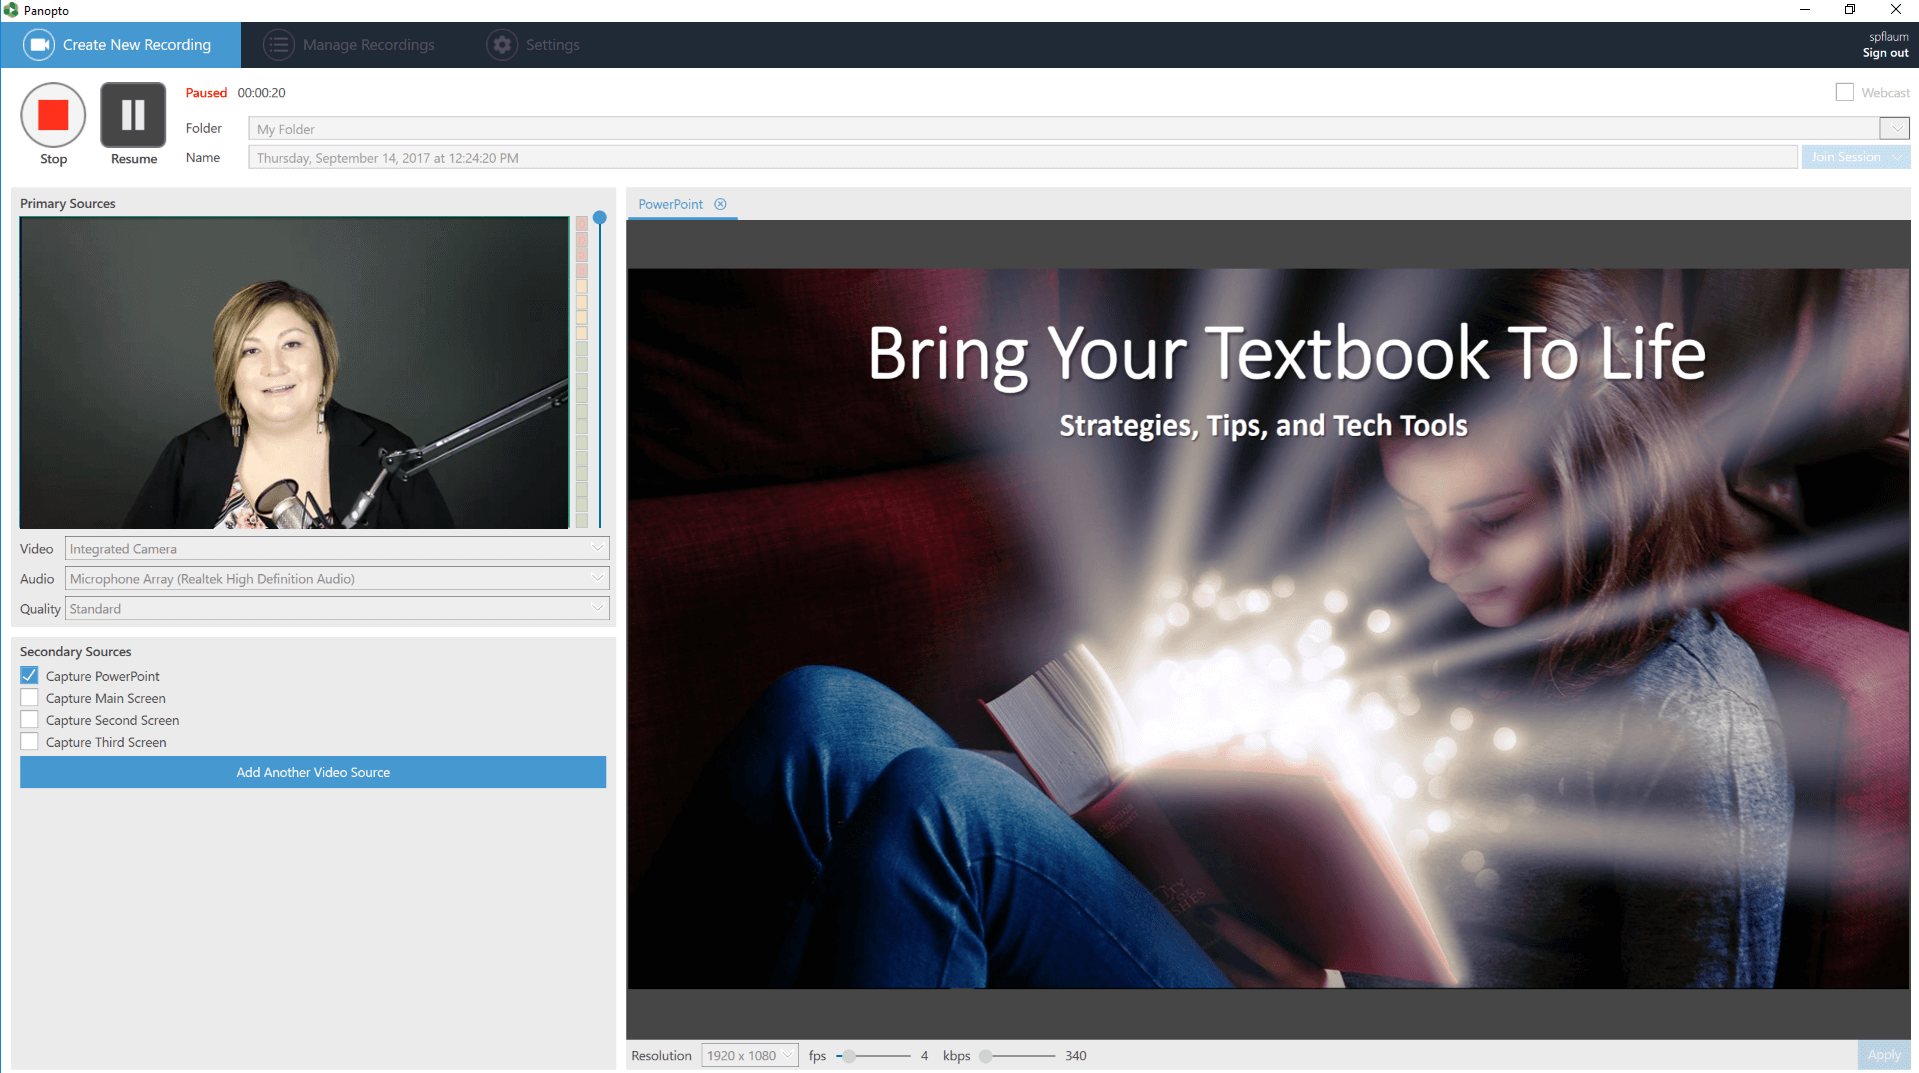
Step 3: Open Your PowerPoint Slides
Open your PowerPoint presentation. With Panopto, you’ll have two options for recording your slides:
First, just click the box next to “Capture PowerPoint” from the options under “Secondary Sources,” and Panopto will automatically launch PowerPoint in presenter mode and capture your slides directly. Once PowerPoint has launched, just present as you normally would.
Or, again under “Secondary Sources,” select to record your screen (or if more than one screen is attached to you computer, which screen or screens you’d like to record). Then manually open PowerPoint on that screen and present as you normally would.
Capture your PowerPoint slides directly from PowerPoint or by capturing your screen.
You’ll notice that you have several options for secondary sources, which means you have a lot of flexibility with Panopto to capture more than just you and your slides. You can share your screen to show a live walkthrough or demonstration along with your slides, and you can even capture multiple video feeds at once. Panopto syncs all of your media in the cloud so you can capture all of the elements of your presentation, no matter the complexity.
Step 4: Press Record And Start Presenting
After selecting your media inputs in Panopto, you’re ready to press record and start presenting. And by clicking “Webcast” in the upper right corner of Panopto before you hit record, you can live stream your presentation. Just grab and share the link that is generated once you start recording.
View A PowerPoint Presentation Recorded With Panopto
Recording Live Presentations With Panopto
Conference rooms and lecture halls can also be set up to record live presentations. After connecting audio and video recording devices to an in-room computer with Panopto installed, a presenter can walk in, pull up their PowerPoint slides, click record and start presenting (check out our recommended recording gear here). It’s an easy and scalable way to record and archive more presentations as they happen within your organization.
Try Recording Your Next PowerPoint Presentation With Panopto
Let your audience experience your full presentation — not just your PowerPoint slides — when you use Panopto to record your next presentation. Contact our team to try Panopto for free for 30 days.
The post The Best Way To Record A PowerPoint Presentation appeared first on Panopto Video Platform.